Every homeowner should have a basic understanding of plumbing maintenance to keep their home running smoothly. In this blog, we’ll discuss how to replace angle stops and turn off your home’s water supply with tips and advice from the trusted experts at Roto-Rooter, your local plumbing and drain service provider. With a legacy of over 80 years, Roto-Rooter offers top-quality plumbing services for residents in the Mobile, Alabama area. You can learn more about their services by visiting their website or checking out their Facebook page.
Understanding Angle Stops
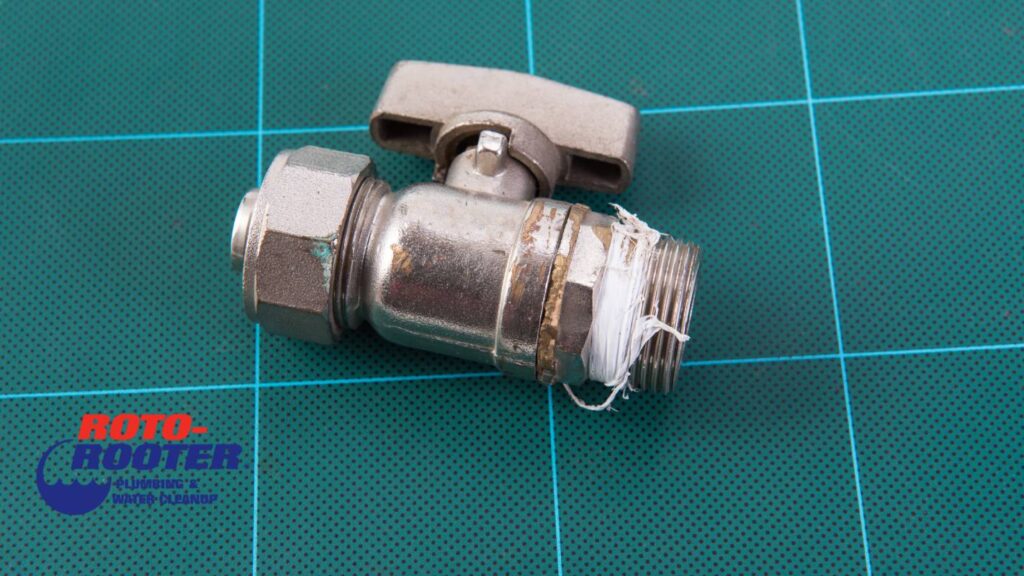
Angle stops are small shut-off valves found under sinks and toilets, connecting the main water supply line to your faucets, toilets and other fixtures. These valves allow you to control the water flow to a specific fixture without shutting off the entire home’s water supply. Angle stops can wear out over time, leading to leaks or, in worst-case scenarios, failure to turn off the water supply when needed.
Replacing Angle Stops
Before you begin, make sure you have the necessary tools and materials, including a new angle stop, an adjustable wrench, a pipe cutter, Teflon tape and a bucket to catch any water spillage.
Step 1: Turn off the main water supply
Before working on any plumbing project, it’s essential to shut off your home’s main water supply. Locate your home’s main water shut-off valve, typically found in your basement or crawl space near your water meter. Turn the valve clockwise to shut off the water supply.
Step 2: Remove the old angle stop
Place a bucket under the old angle stop to catch any residual water. Using an adjustable wrench, disconnect the supply line from the angle stop. Next, use the pipe cutter to cut the pipe just above the old angle stop, taking care not to damage the pipe.
Step 3: Install the new angle stop
Wrap Teflon tape around the threads of the new angle stop, ensuring you wrap it in the same direction as the threads to create a tight seal. Position the new angle stop onto the pipe and use the adjustable wrench to tighten it securely. Connect the supply line to the angle stop, taking care not to overtighten.
Step 4: Turn the water supply back on
Once you’ve replaced the angle stop, turn the main water supply back on by turning the valve counterclockwise. Check for any leaks around the new angle stop and supply line connection. If there are no leaks, you’ve successfully replaced your angle stop.
When to Call a Professional
While replacing angle stops is a manageable DIY project for most homeowners, it’s essential to know when to call a professional. If you encounter any issues or are uncertain about the process, don’t hesitate to contact Roto-Rooter. Their team of skilled and experienced plumbers is available 24/7 to assist with your plumbing needs. Save their number, (251) 479-9454, in your contacts for any plumbing emergencies.
Understanding essential plumbing maintenance like replacing angle stops and turning off your home’s water supply can save you time, money and headaches in the long run. By following the steps above, you can maintain your plumbing system and keep your home in top condition. If you require professional assistance, remember to trust Roto-Rooter for all your plumbing and drain service needs.